IAM (Identity and Access Management)
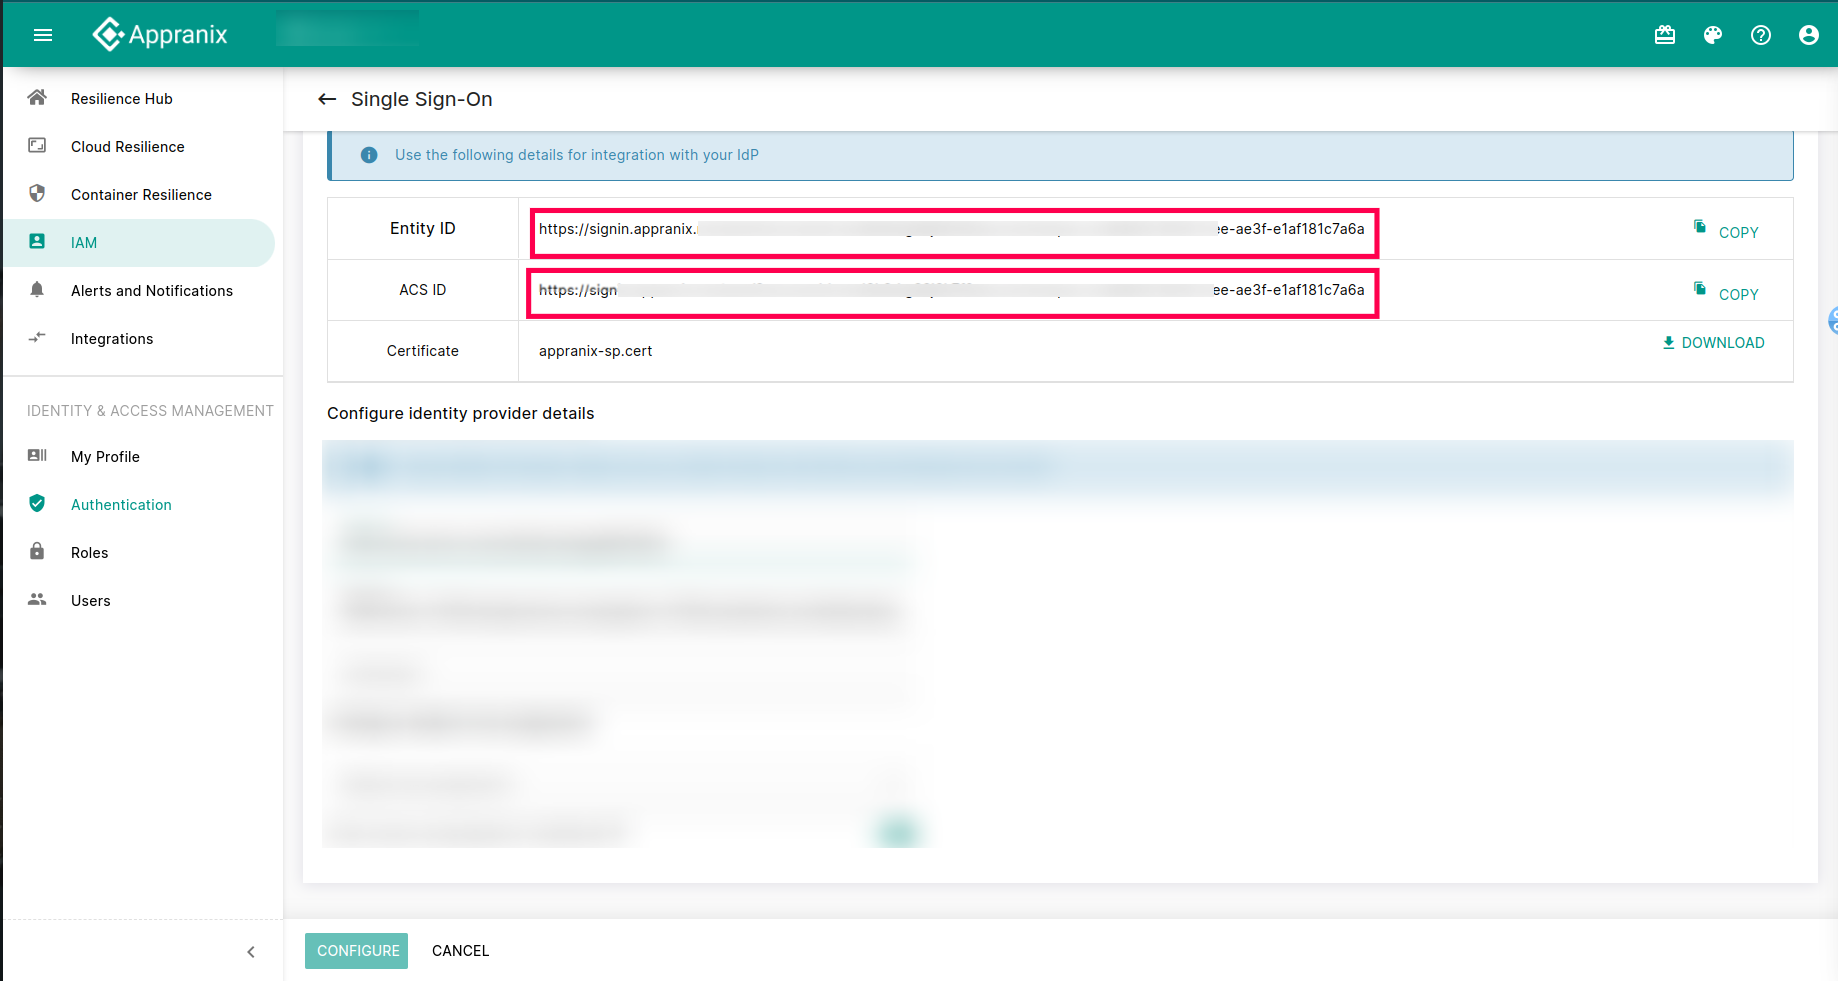
Single Sign-On
Single Sign-On allows the users to use an existing authentication mechanism, which provides centralized access for the users.
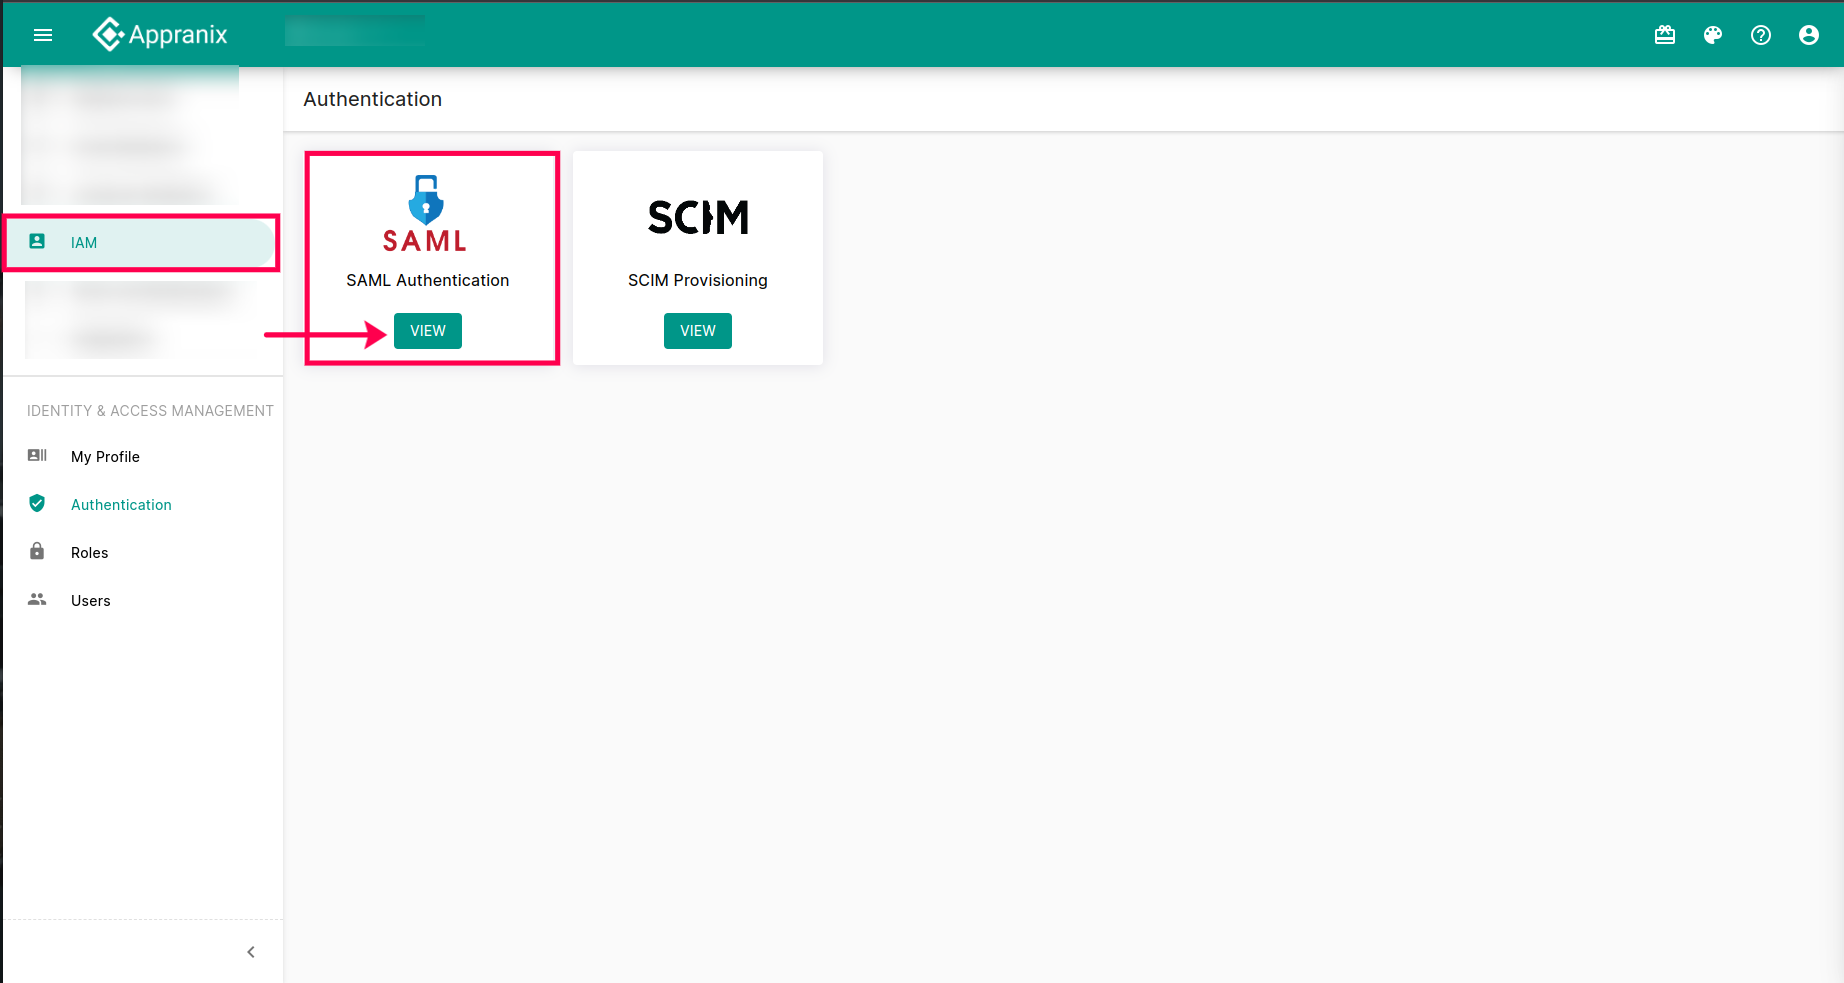
Configured SAML authentication
Appranix accepts only SAML assertions from the configured Identity Provider(IdP) in each account. Appranix supports SAML authentication with various Identity Providers(IdP). Users can log in to Appranix by using their account URL and login credentials provided by their IdP. This section displays the entity ID and Assertion Consumer Service(ACS) URL’s details about the configured SAML authentication.
Configuring SAML in Appranix with OKTA is straightforward. Follow these steps:
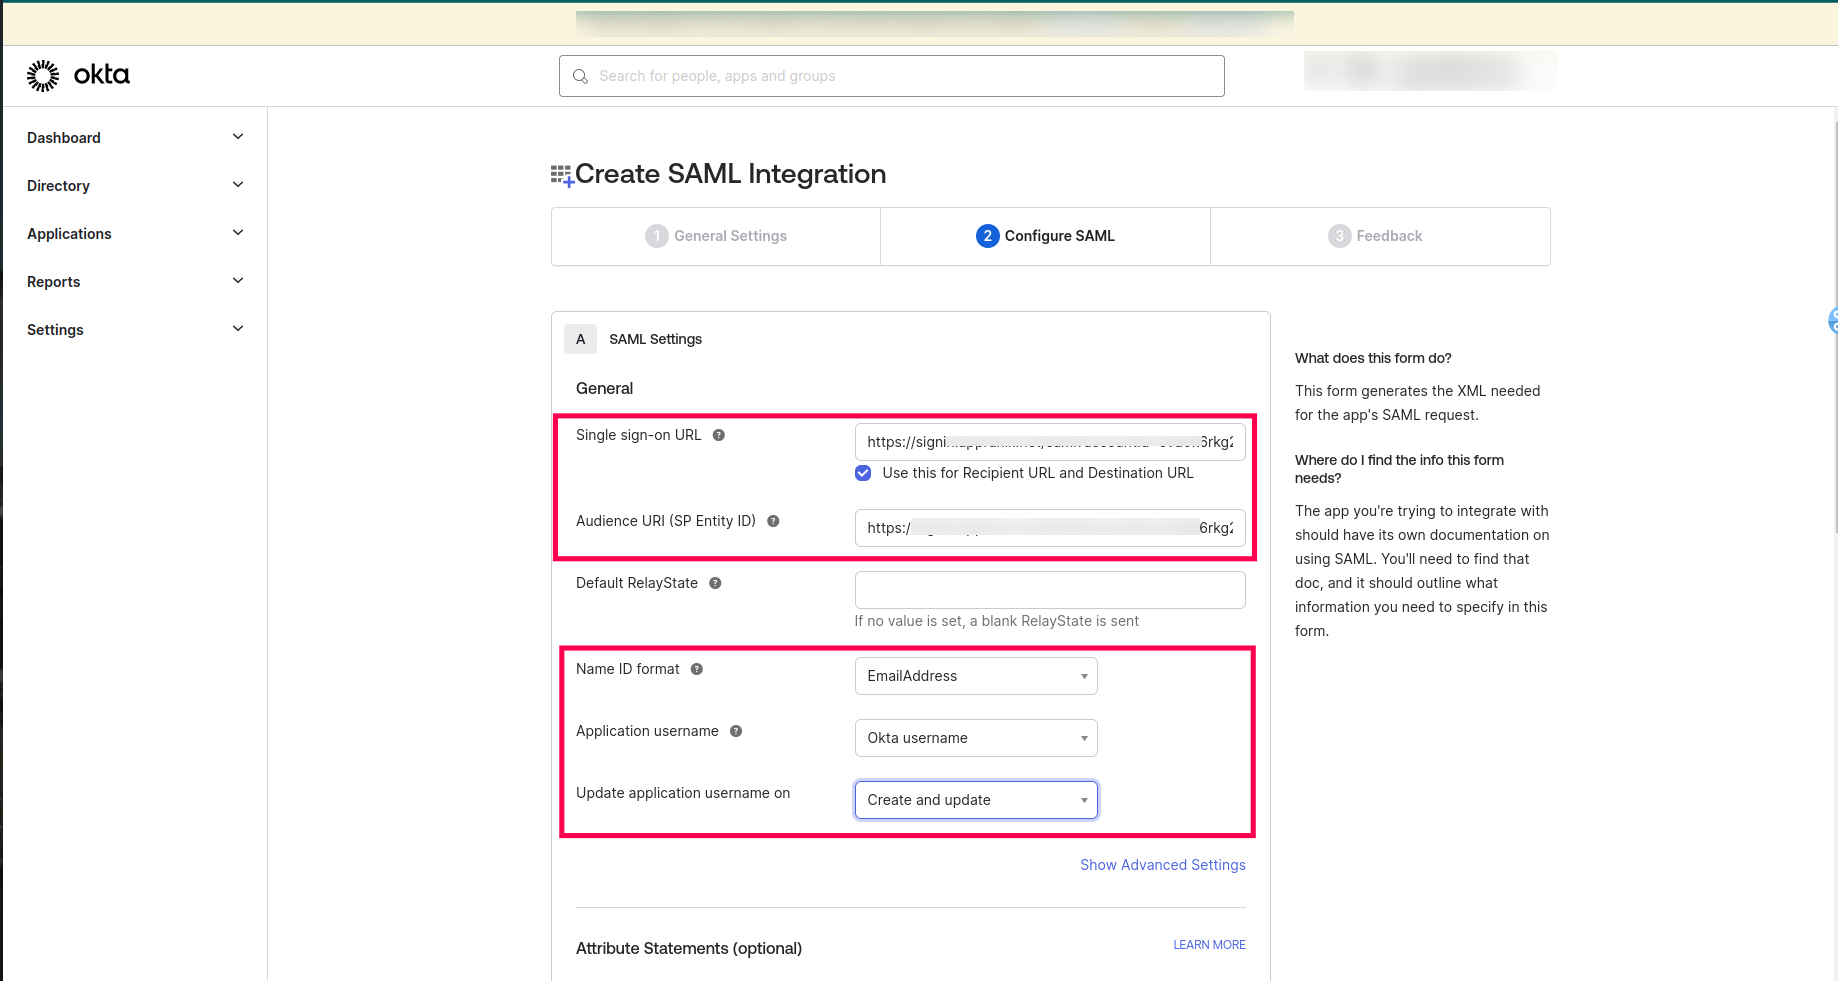


Create an Appranix Application,
- Set the Single Sign-On URL to the Appranix ACS URL.
- Paste the Entity ID from Appranix.
- Configure the below attributes as follows:
- Name ID Format: Email address
- Application User Name: OKTA username
- Update Application Username On: Create and Update
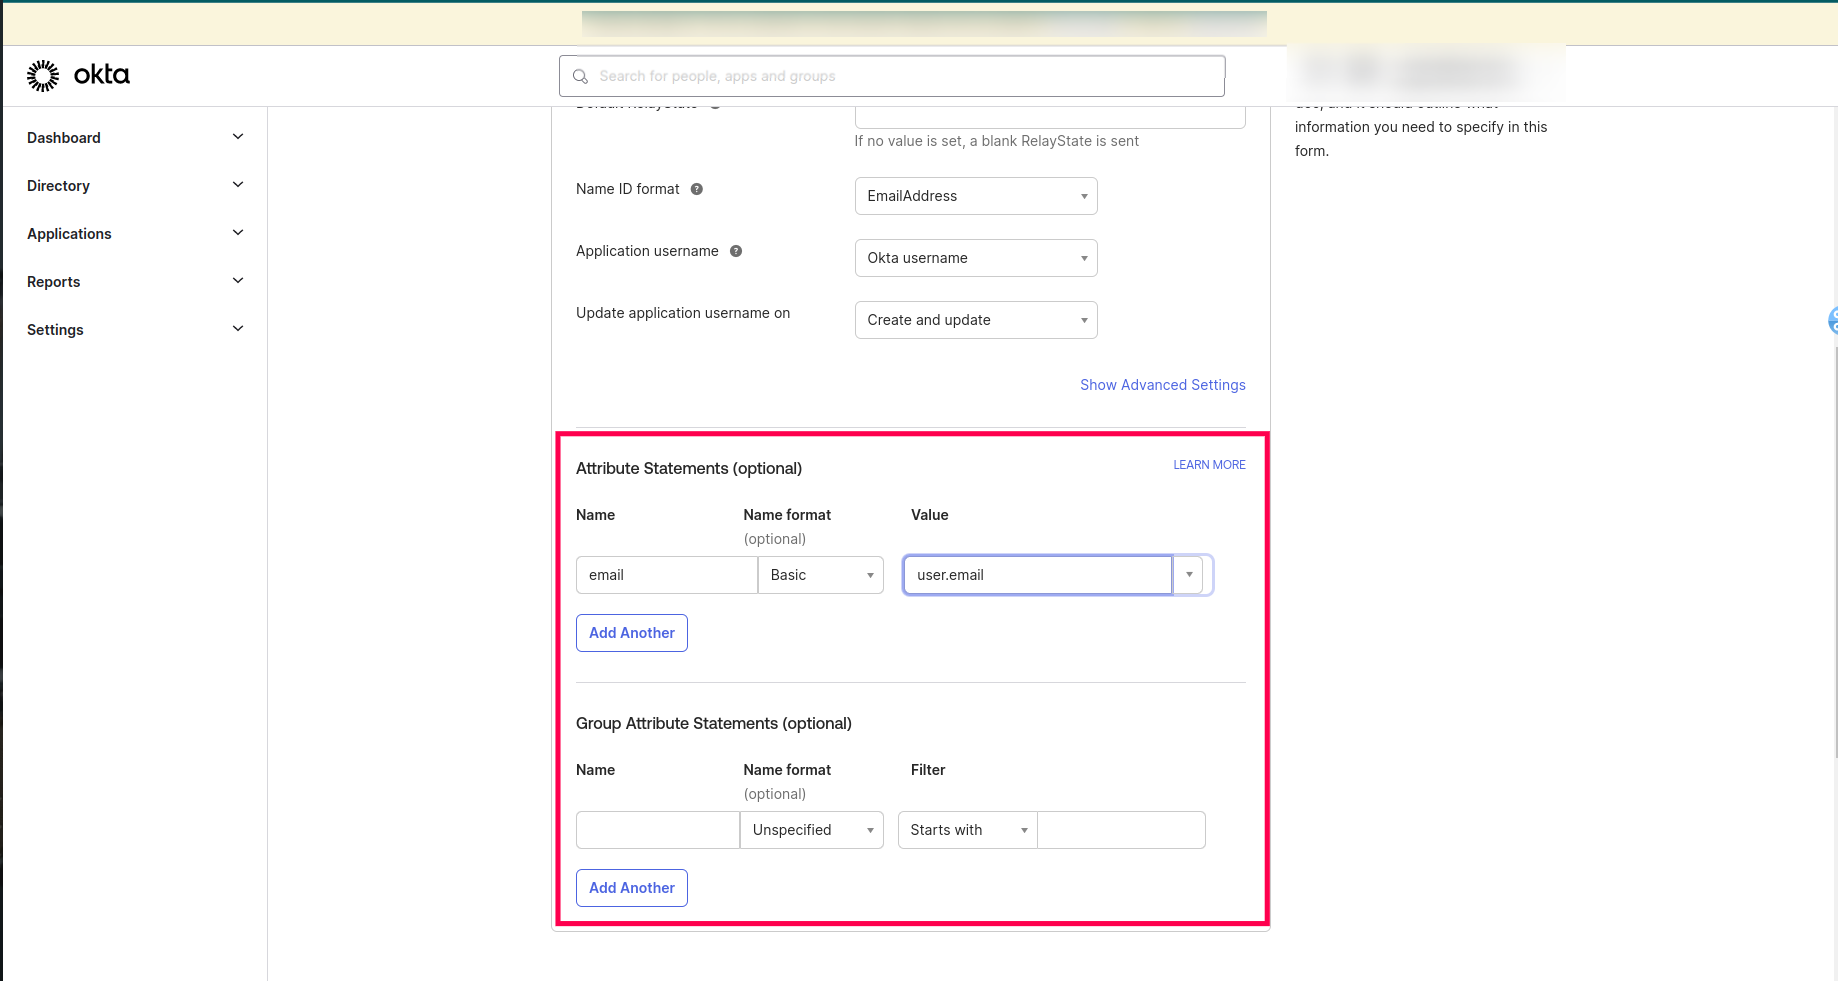
- Attribute Statement,
- Name: email
- Name Format: Basic
- Value: user.email
- Group Attribute Statements (Optional)
- Save the Configuration.
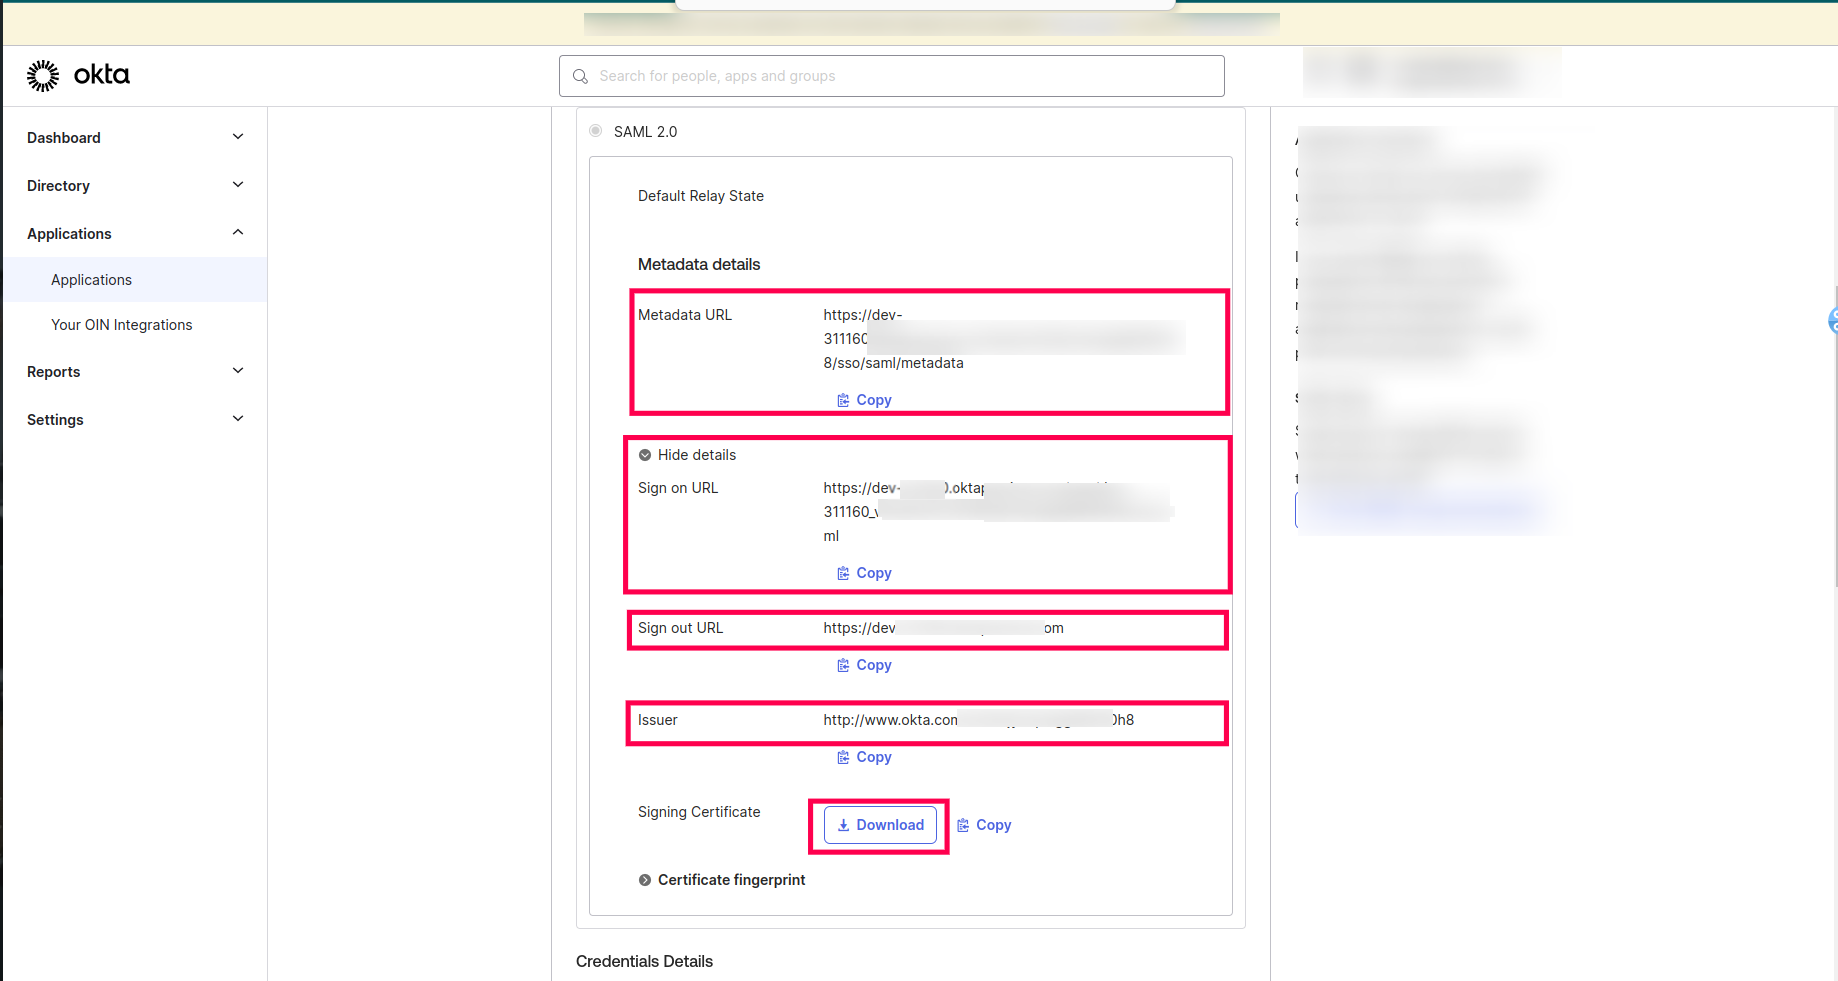
Navigate to Sign-On Settings,
- Copy the Issuer Value and paste it under Appranix Entity ID.
- Paste the Sign-On URL under the Appranix ACL URL.
- Download the Certificate, copy the cert value, and paste it into the Appranix certificate section.
- Assign desired Roles and click configure.
Follow these steps to configure SCIM in Appranix with OKTA,
Under Application Provisioning,
- Enable the SCIM option.
- Copy and paste the Base URL from Appranix.
- Set the Unique Identifier Field to "email".
- Enable the following Provisioning Actions:
- Import New Users and Profile Updates
- Push New Users
- Push Profile Updates
- Choose Authentication Mode as HTTP Header.
- Generate a token in Appranix and paste it under HTTP Header Authorization.
- Save the changes.
After saving the SCIM configuration edit, enable the below-listed items,
- Create Users
- Update User Attributes
- Deactivate Users.
Now under Assignments, click "Assign" and select the users.
Need more help?
Submit a ticket